
How to install Government Context
Install Government Context in any MCP client. This hub covers the setup for each one, starting with connecting the free MCP server to ChatGPT in the desktop app and on the web.
Plugins for Government Context are on the way, and they will make installation much simpler. Until they land, you can already use Government Context in most AI apps by adding it as a custom MCP server, which is what this page covers.
Government Context runs one MCP server, and any MCP client can connect to it. The address is the same everywhere:
https://mcp.governmentcontext.com
What changes from client to client is where you paste that address. This page collects the setup for each one. Start with the section for the tool you use.
How to connect Government Context to ChatGPT
Add Government Context as a custom MCP server in ChatGPT, then sign in to a free Government Context account to authorize it. Setup takes about five minutes and no credit card. The steps differ between the desktop app and the web, so follow the one that matches how you run ChatGPT. ChatGPT also sets up custom MCP servers per application: if you use both the desktop app and the web, add Government Context in each. There is no option to add it in the ChatGPT mobile app.
One thing to check on the ChatGPT side first: custom MCP connectors are a paid-plan feature (Plus, Pro, Business, Enterprise, or Edu), not part of the free ChatGPT tier. If you don't see the settings described below, that is usually why. The Government Context account itself stays free.
In the ChatGPT desktop app
-
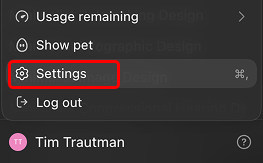
Open your account menu at the bottom of the sidebar and click Settings.
-
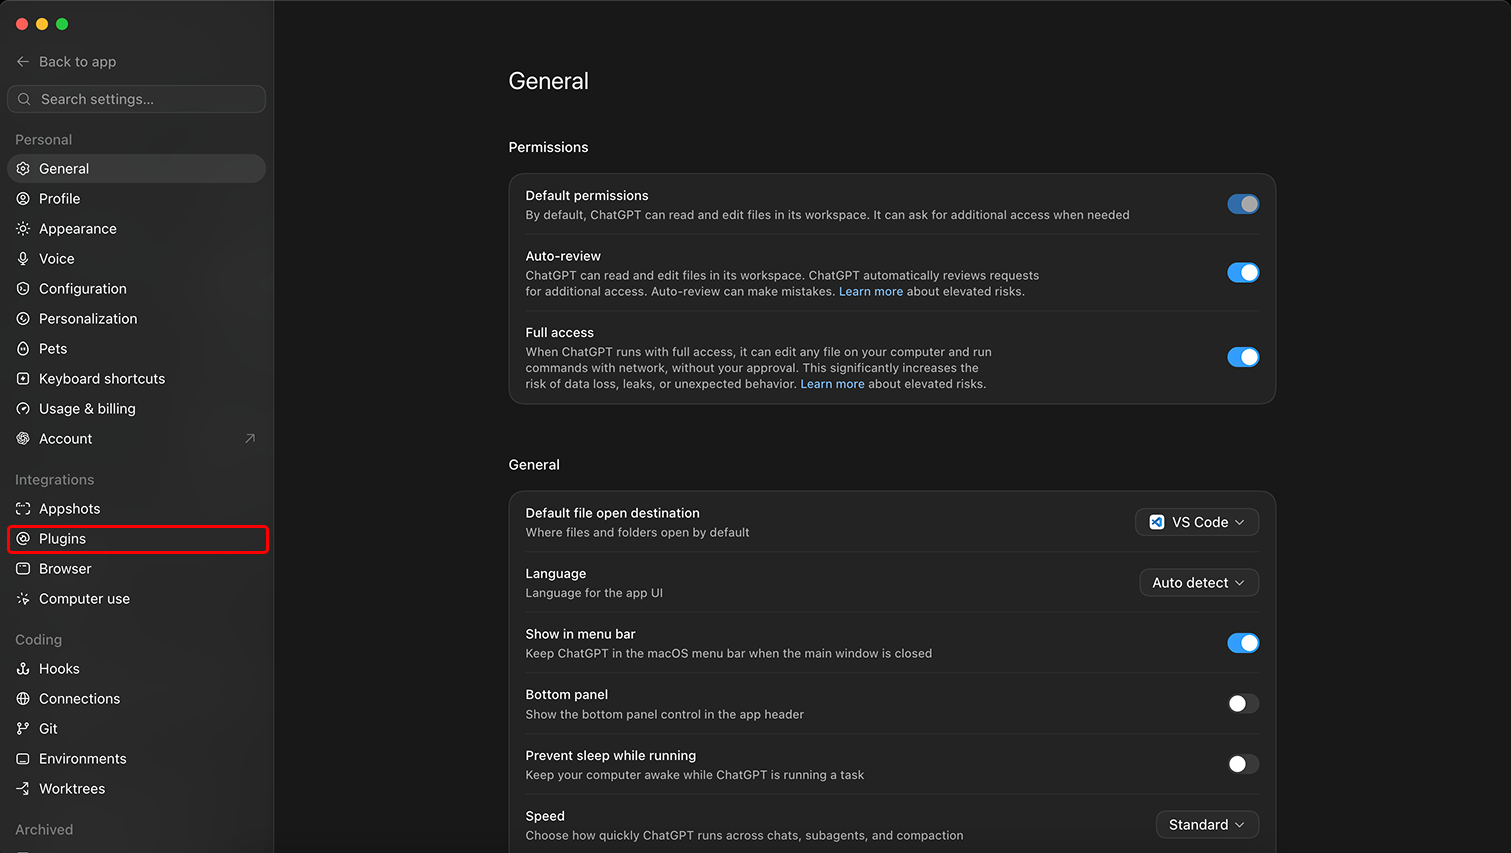
In the Settings sidebar, find the Integrations group and click Plugins.
-
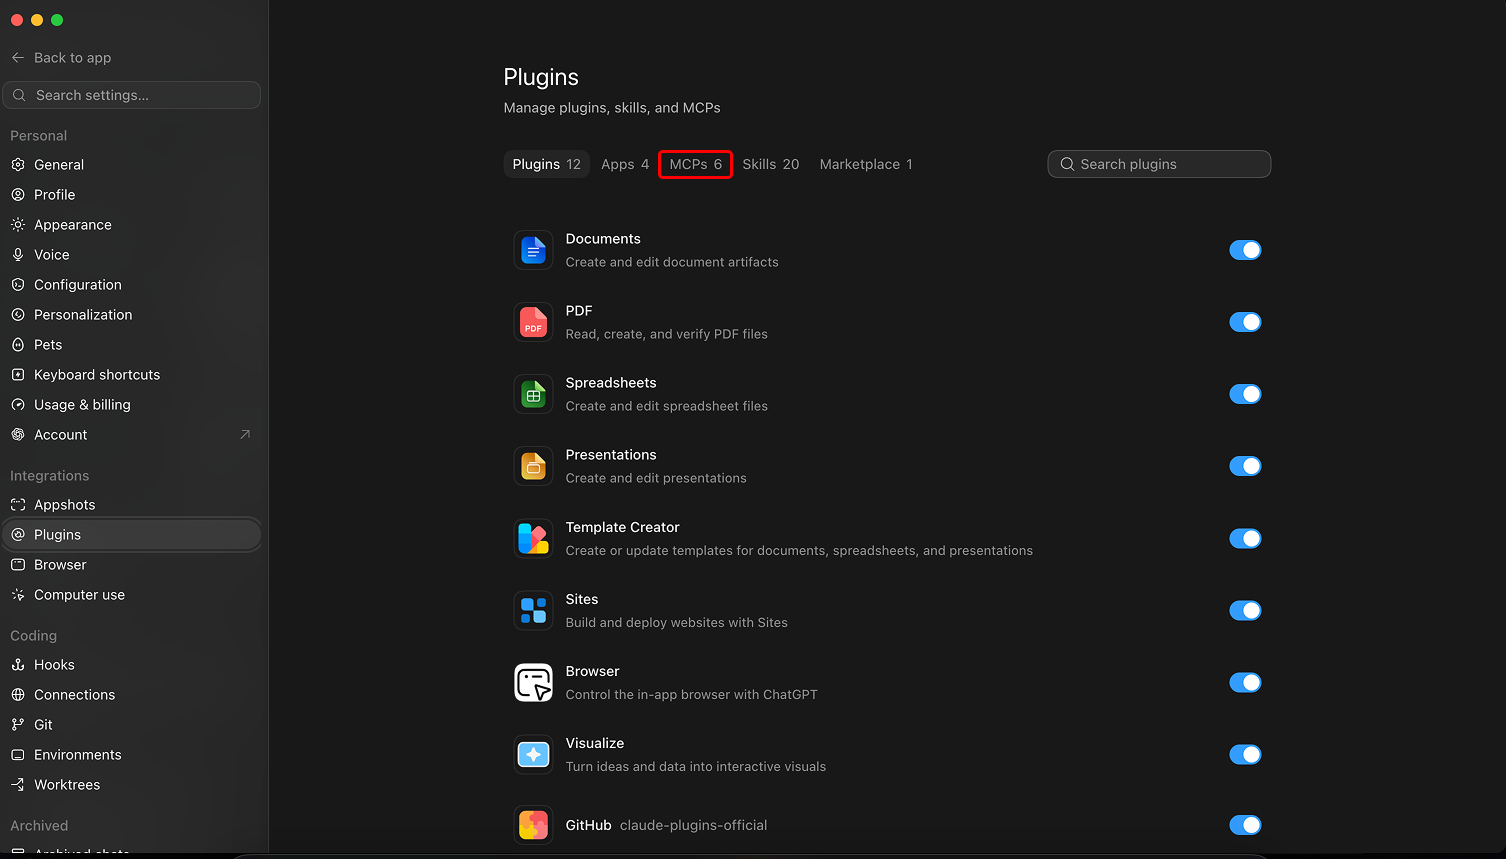
On the Plugins screen, open the MCPs tab.
-
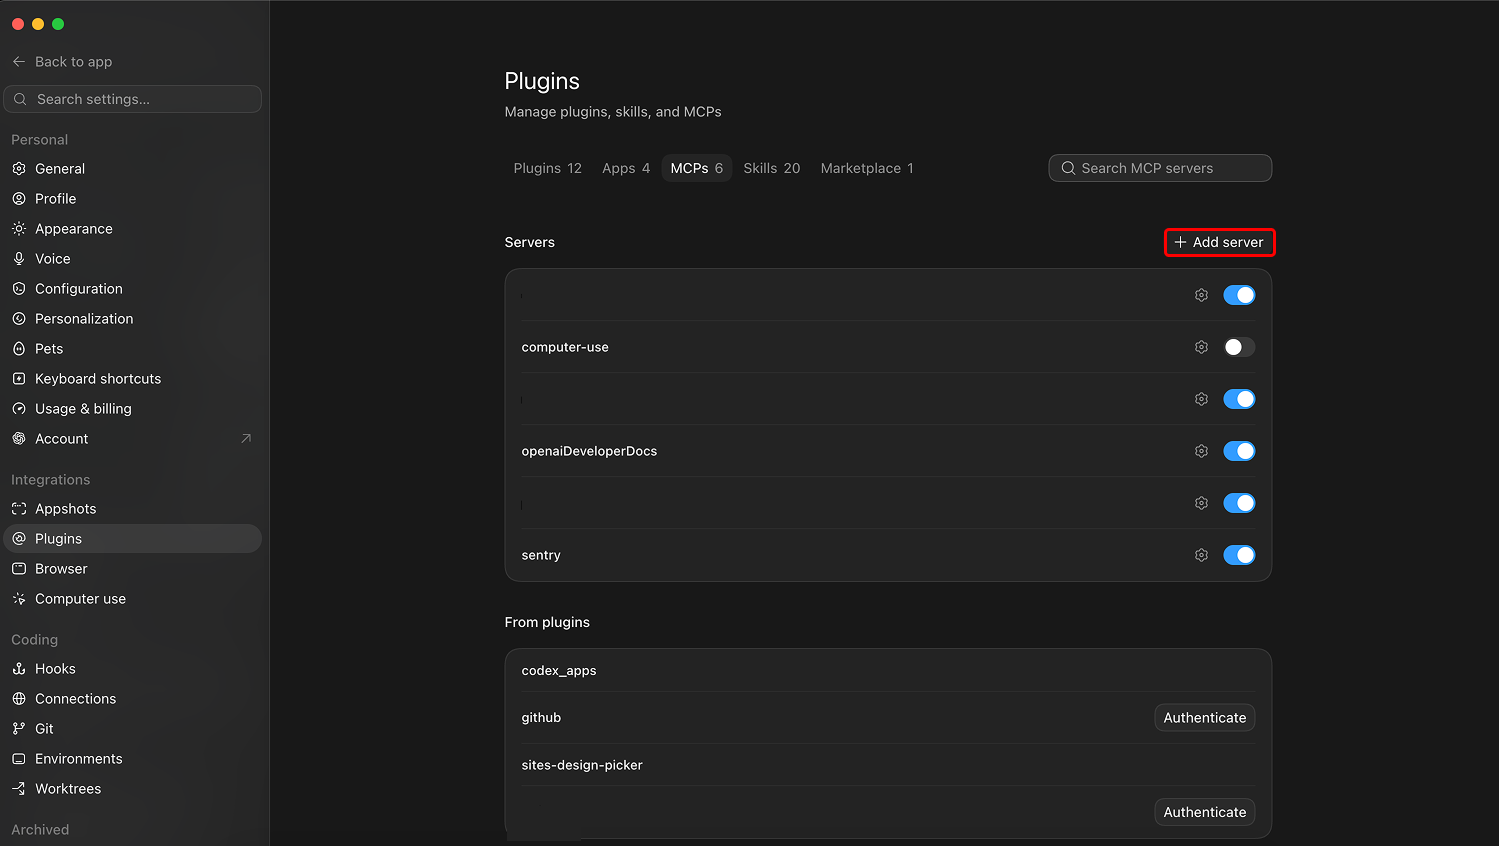
Under the Servers heading, click Add server.
-
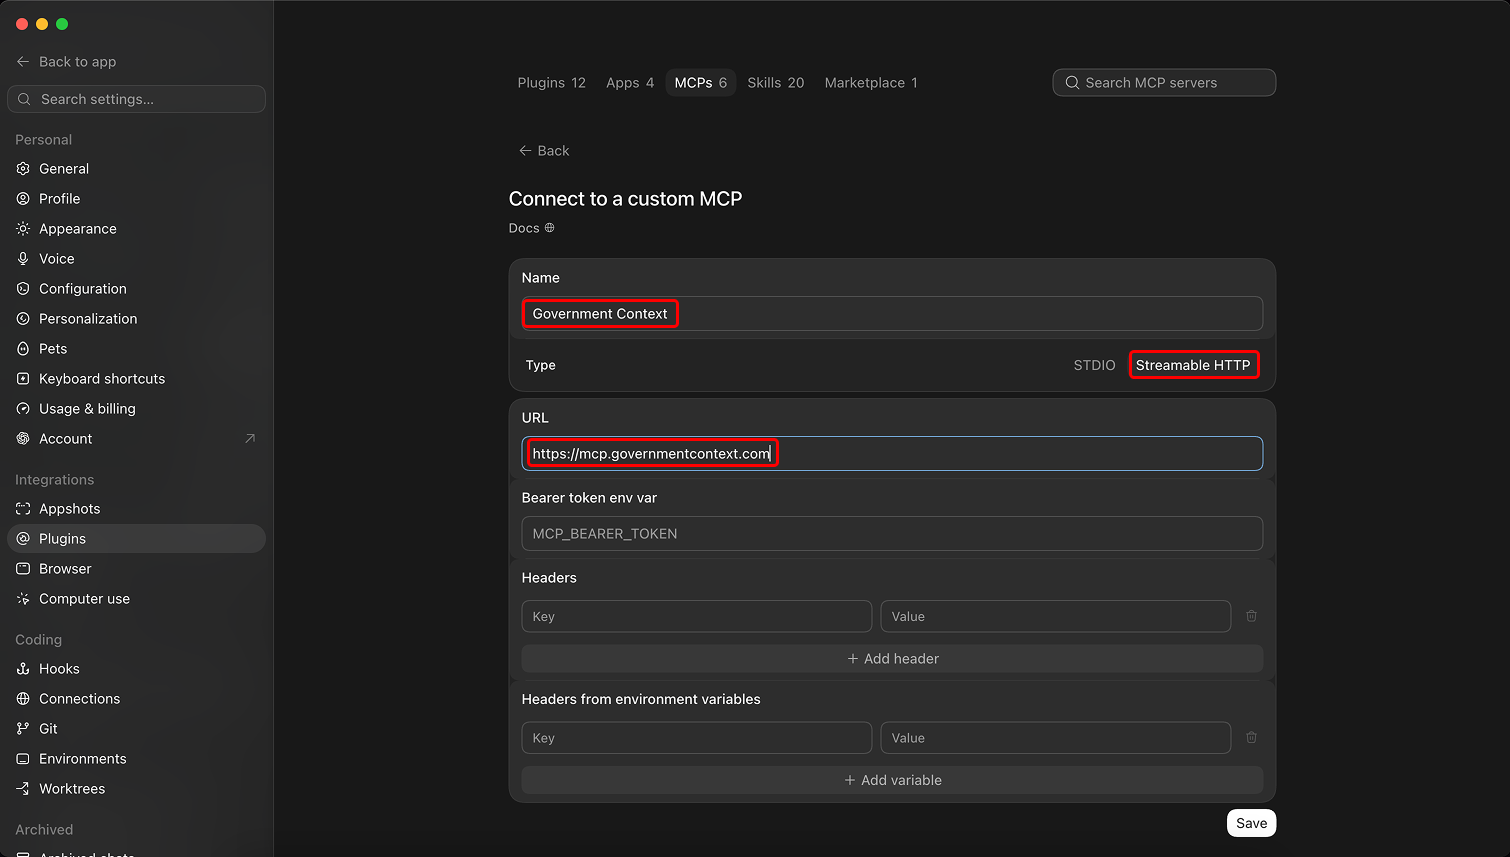
Fill in the "Connect to a custom MCP" form, then click Save:
- Name:
Government Context - Type:
Streamable HTTP(not STDIO) - URL:
https://mcp.governmentcontext.com - Leave the bearer token and the header fields empty. You sign in through your browser in the next step, so there is no token to paste here.
- Name:
-
The server now shows up in your list as
government_context. Click Authenticate to sign in and approve access.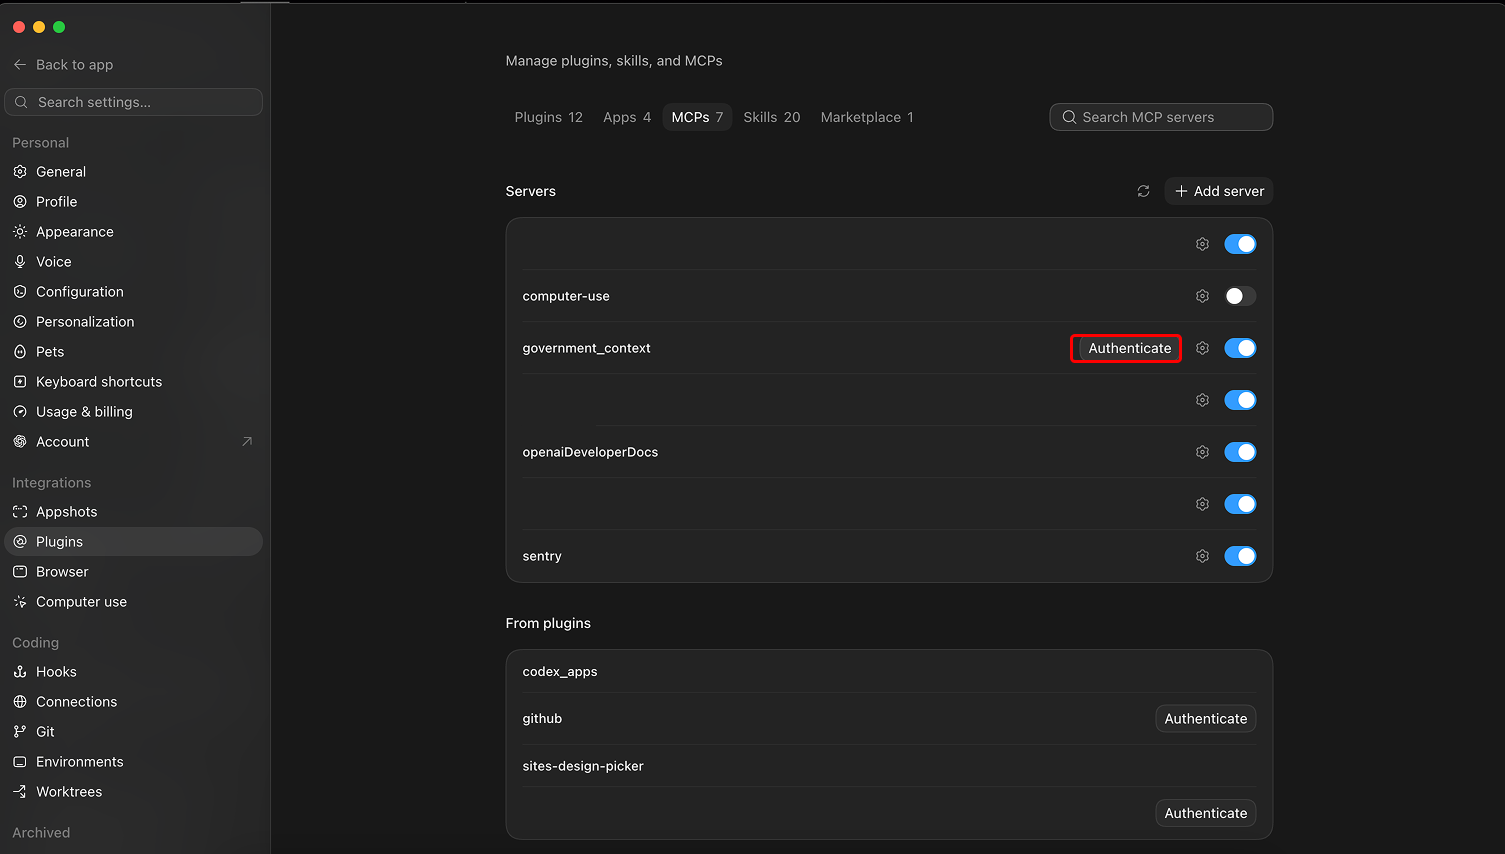
Clicking Authenticate starts the sign-in step covered under Create your Government Context account and authorize the connection below.
On the web at chatgpt.com
ChatGPT on the web keeps custom MCP connectors behind developer mode, so the order is a little different from the desktop app. You turn developer mode on first, then add the server. On Business, Enterprise, and Edu workspaces, an admin may need to allow custom connectors before you can do this.
-
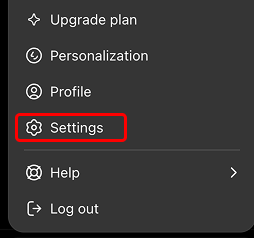
Open your account menu and click Settings.
-
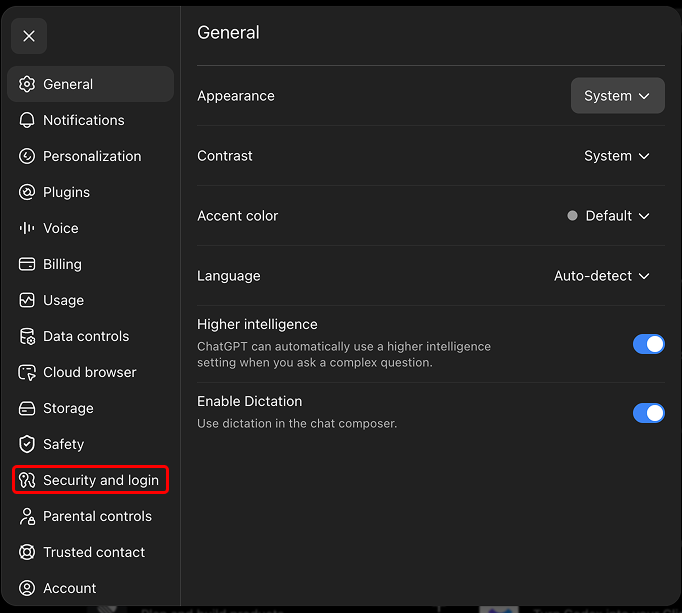
In the Settings sidebar, click Security and login.
-
Find Developer mode and turn it on. ChatGPT flags this as elevated risk because it lets you add connectors it has not reviewed, which is what you want here.
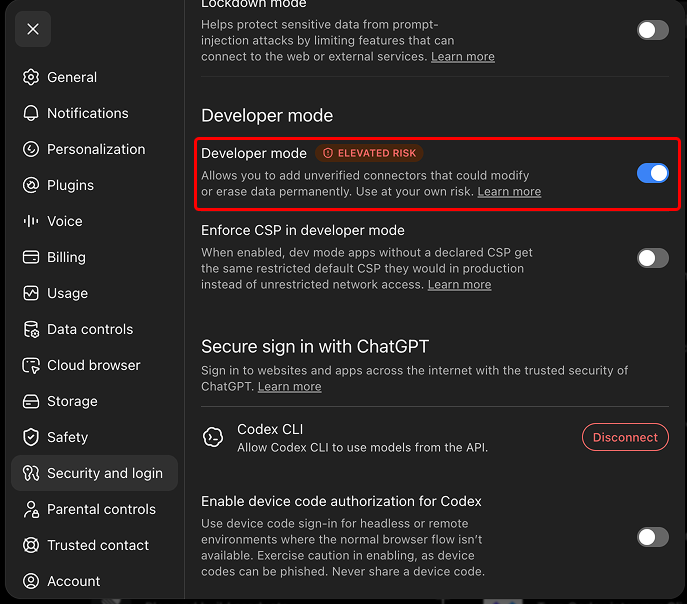
-
Open the Plugins section, then click Browse plugins.
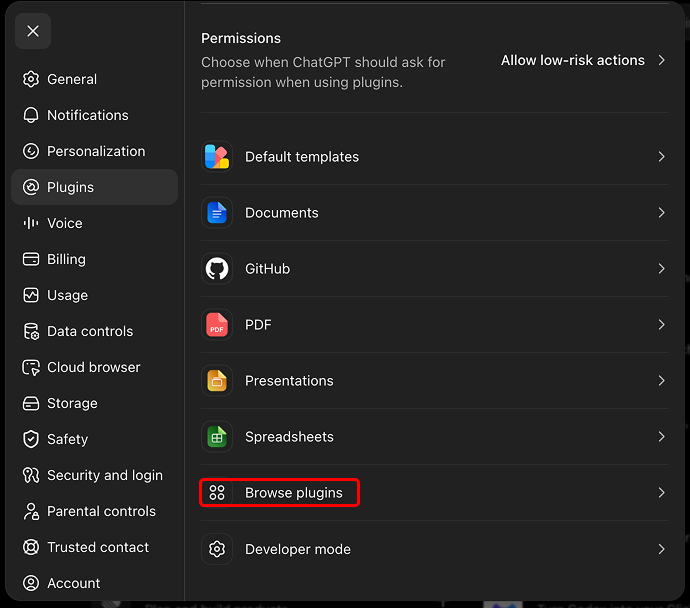
-
On the Plugins screen, click the + button next to the search box to add one.
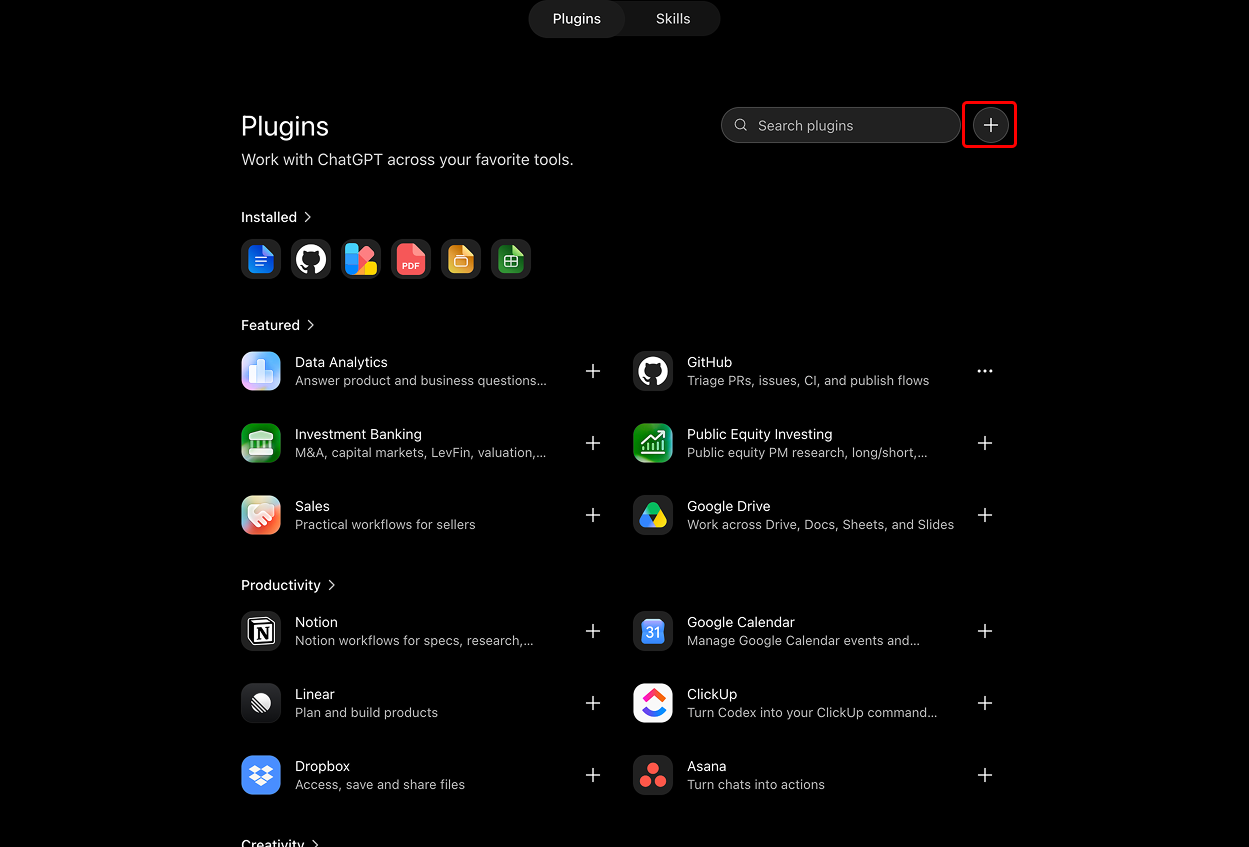
-
Fill in the New Plugin form, then click Create:
- Name:
Government Context - Connection:
Server URL - URL:
https://mcp.governmentcontext.com - Authentication:
OAuth - Check I understand and want to continue to acknowledge the warning about custom MCP servers.
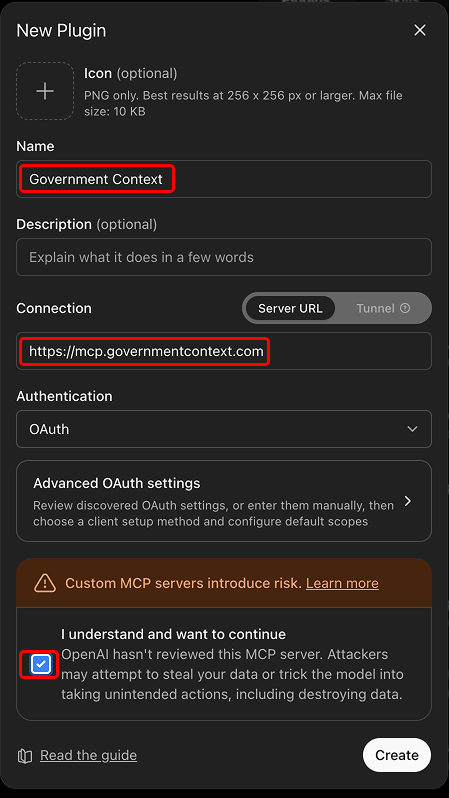
- Name:
-
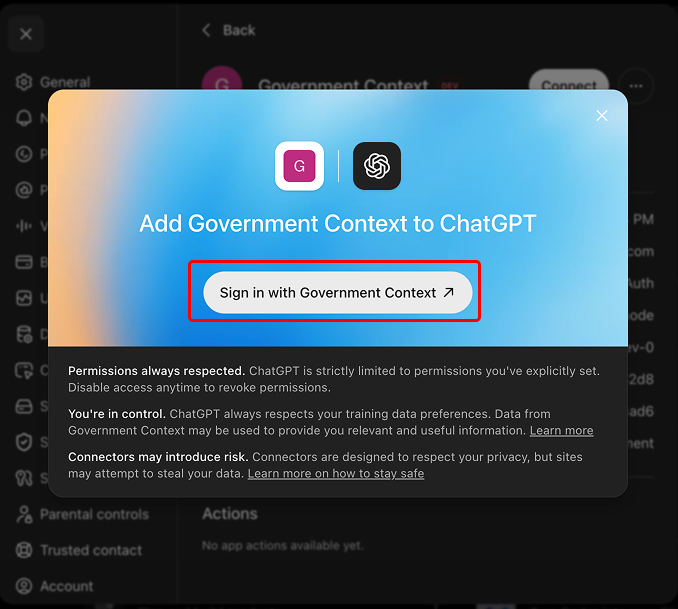
On the next screen, click Sign in with Government Context. You need a Government Context account to sign in, so create one first if you do not have it yet. The free option is enough to get started.
-
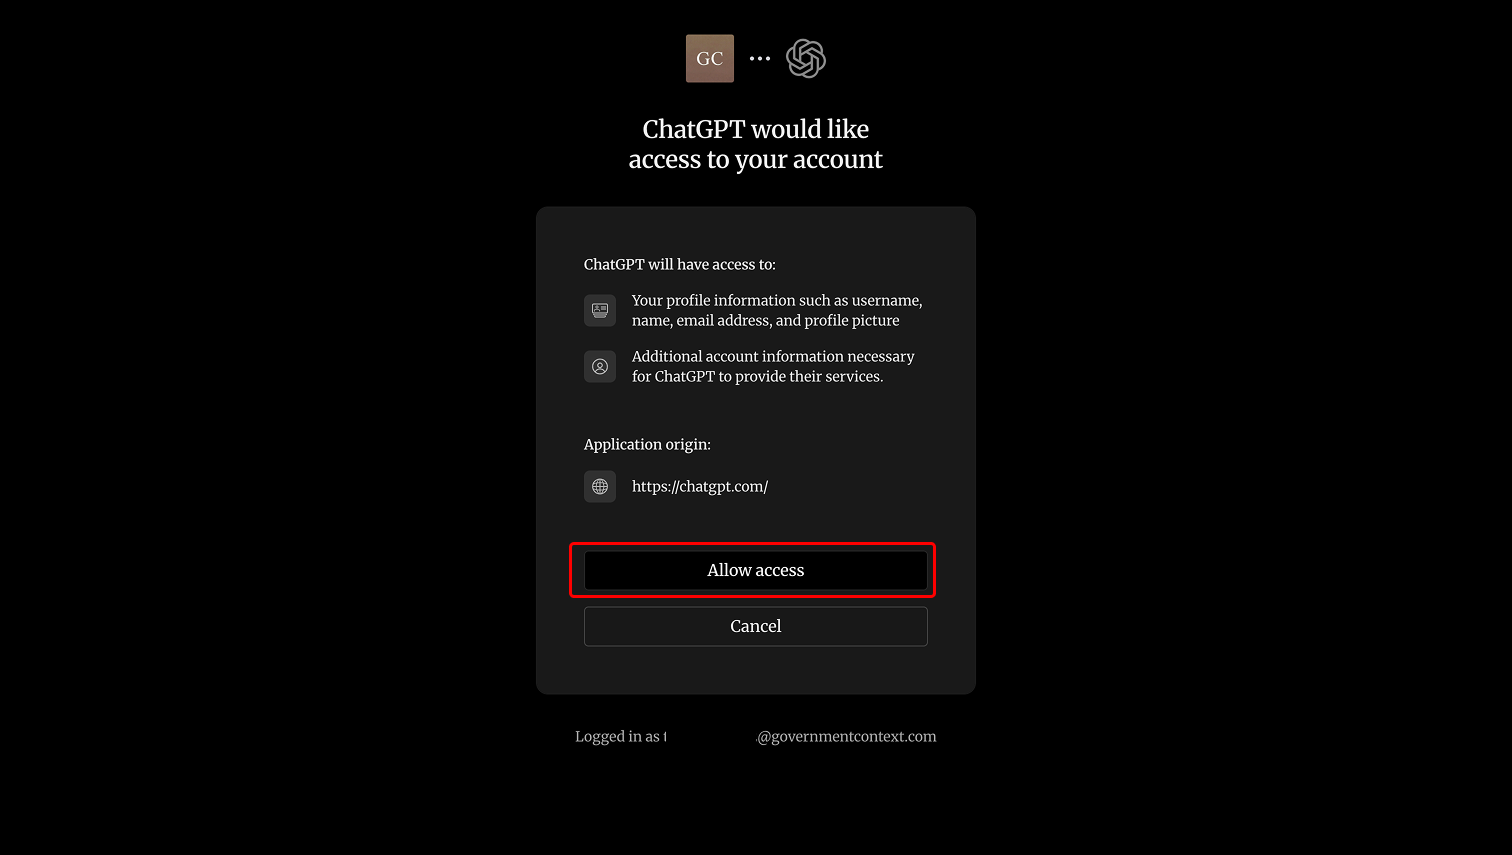
Sign in, then click Allow access. This runs over OAuth, so ChatGPT gets a scoped token and you never copy or paste one.
-
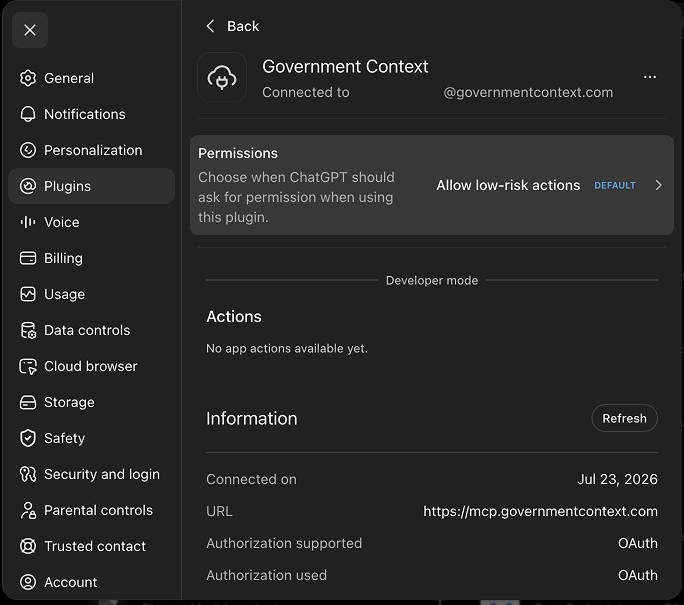
The connector now shows as connected, with OAuth listed for authorization.
-
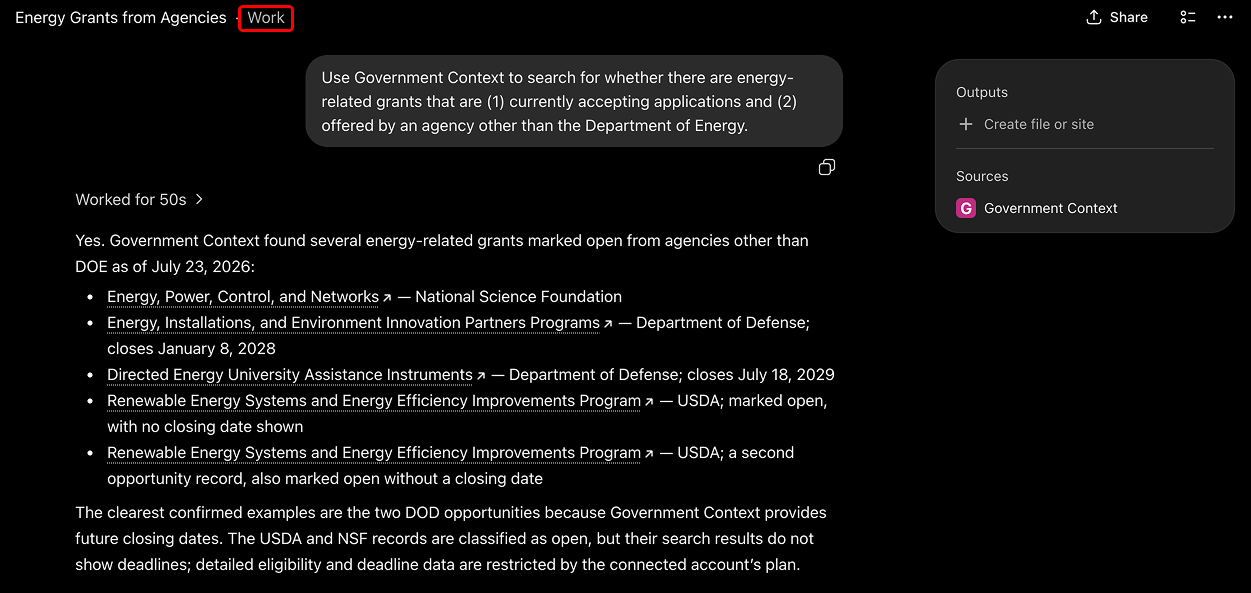
Start a new chat in Work mode and ask it something. The connector is only available in Work mode, not in a regular chat. Here it answers a question about open energy grants in Work mode, with Government Context listed as the source.
For more on what each tool does and the deeper analytics, see the tool reference.
Create your Government Context account and authorize the connection
Whichever platform you used, the last step is the same handshake. Clicking Authenticate in the desktop app, or finishing the connector on the web, opens your browser to sign in to Government Context.
- If you already have a Government Context account, sign in.
- If you don't, create one. New accounts start on the free tier, and you don't need a card.
- Approve access for ChatGPT. This runs over OAuth, so ChatGPT receives a scoped token and you never copy or paste one yourself.
Once you approve, the connector shows as connected and ChatGPT can call the Government Context tools whenever a question needs them. Start a new chat and ask something like "which trade associations oppose the FMCSA broker-transparency rule, and what are they arguing?"
The free tier is enough to try all of this. It covers search, rule and bill details, comment reading, the comment-corpus overview, and basic filters, on data up to one release cycle behind (public comments become visible after seven days). For the deeper analytics and the full walkthrough of what each tool does, see the tool reference.
How to connect Government Context to Claude
Claude connects to Government Context through a custom connector, which is Claude's name for a custom MCP server. The steps below use the Claude desktop app, but the process is the same on the web at claude.ai.
-
Open the menu under your name and click Settings.
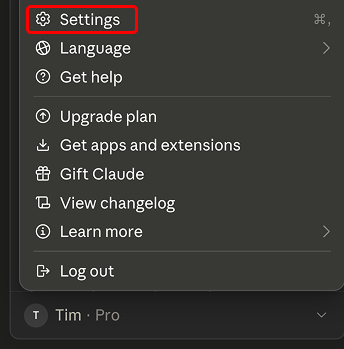
-
In the Settings sidebar, click Connectors.
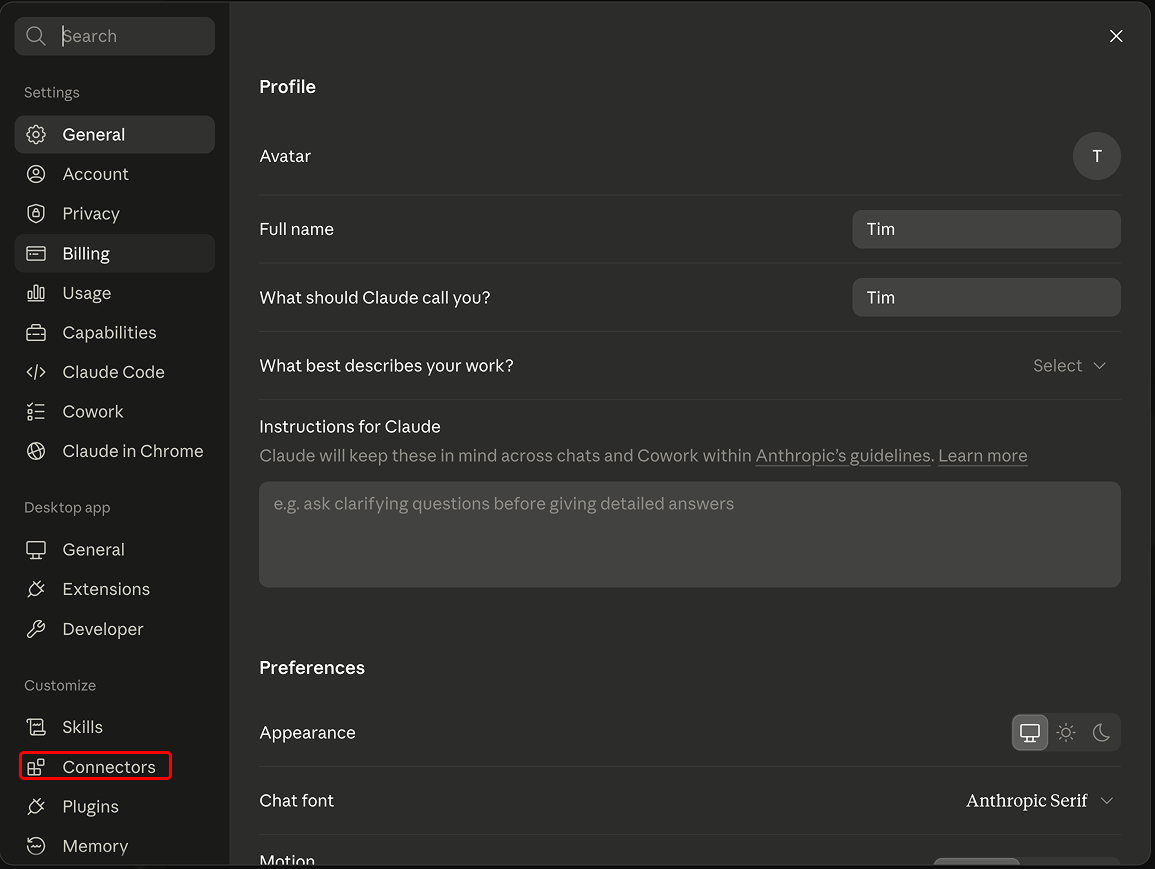
-
Click Add at the top right of the Connectors screen.
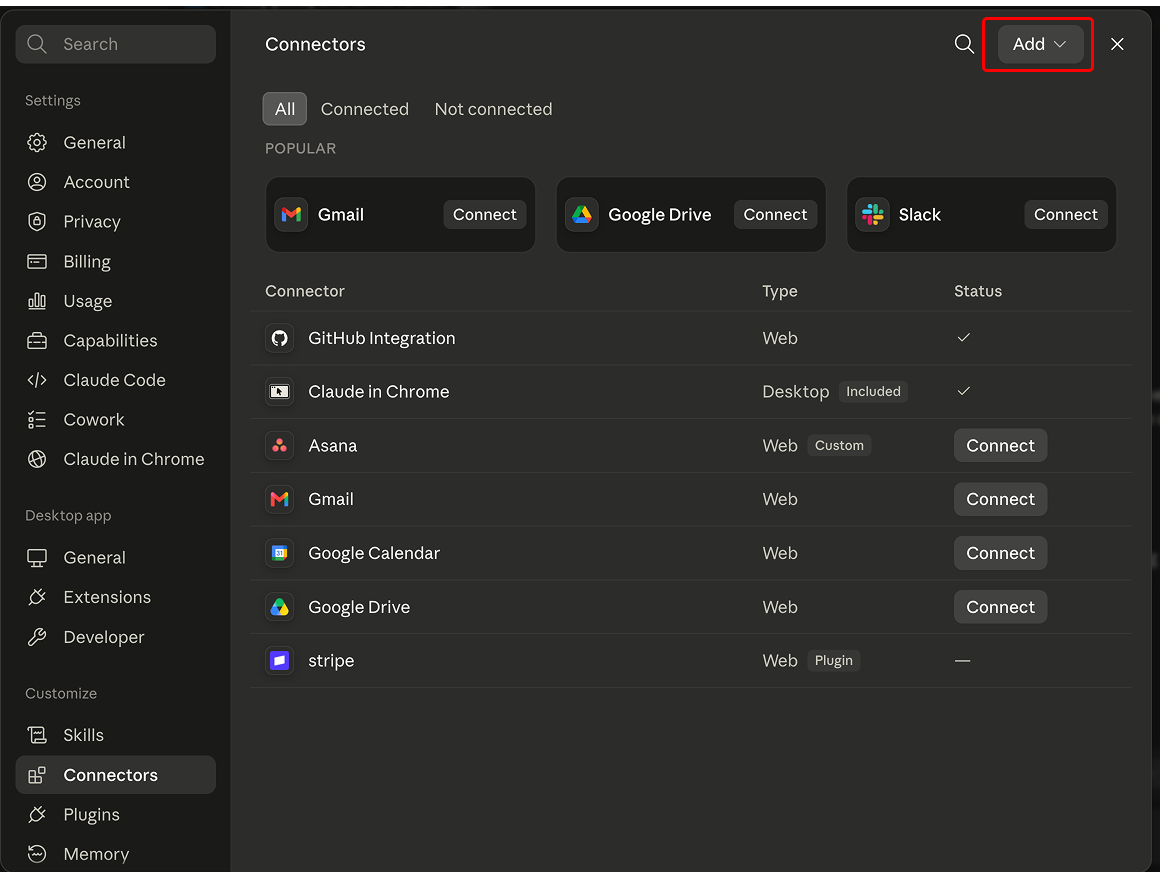
-
In the menu that opens, click Add custom connector.
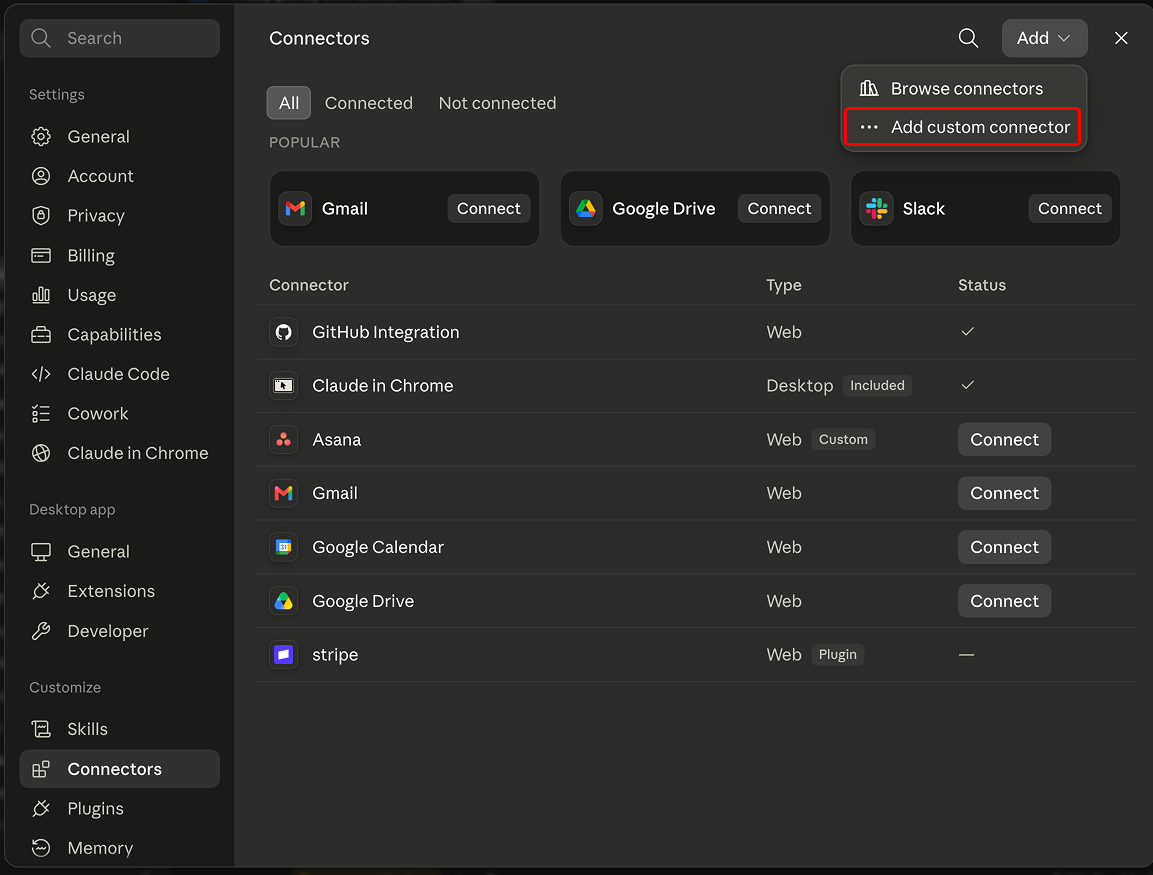
-
Fill in the Add custom connector dialog, then click Add:
- Name:
Government Context - URL:
https://mcp.governmentcontext.com - Leave the OAuth client ID and secret empty. You sign in through your browser in the next step, so there is nothing to paste here.
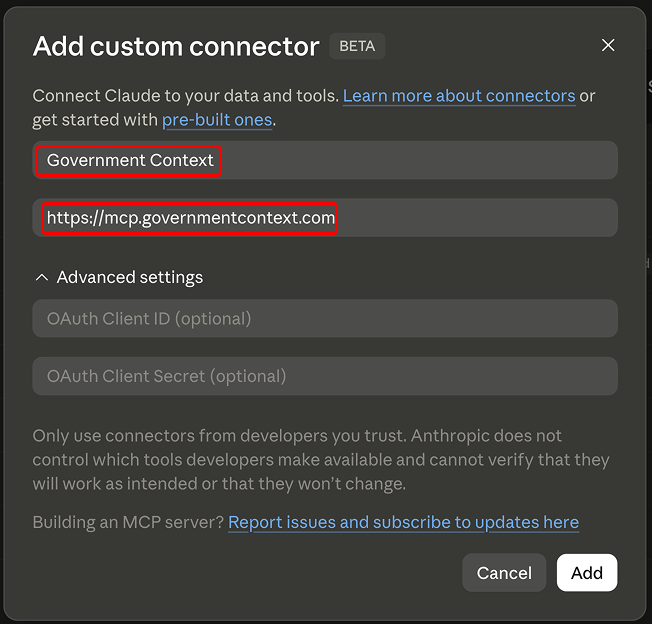
- Name:
Claude then opens your browser to sign in to Government Context and approve access. You need a Government Context account for this step, so create one first if you do not have it yet. The free option is enough to get started. Once you approve, the connector shows as connected and Claude can call the Government Context tools whenever a question needs them.
Government Context syncs with your Claude account, so once you add it in one Claude application it works in the others too. You cannot add a custom connector in the Claude mobile app, but once you have added Government Context on the desktop app or the web, you can use it on mobile. (ChatGPT is different: there you add the server separately in each application, and it cannot be added on mobile at all.)
Start tracking the rules that matter to you
Browse the full rulemaking record for free, or unlock the comment Explorer and alerts on your documents, topics, and agencies.